Showing posts with label activities. Show all posts

April 2, 2012

Craft Stick Puzzles: Printable and Tutorial

Craft stick puzzles are one of my new favorite things.  My kids love them, and they're cheap to make, and they don't get destroyed like paper pieces.

If you haven't made craft stick puzzles before, let me tell you how tremendously easy it is.

First, download this printable (because they're cute and sized right and just all around better than other craft stick puzzles):


Print the pages on cardstock and cut around the whole puzzle (don't cut each piece out yet).

This next step is optional, but I highly recommend it.  Cover the fronts (only) in clear contact paper.  This will help your puzzles last longer, especially since you know they're going to be handled by grubby little kid fingers.

Then chop the pieces apart with a paper slicey-cutter-thingy. (There are lines on the puzzles, so you know where to chop.)


Get a bunch of big craft sticks out, and rubber cement a piece to each one.  Try to center the pieces on the craft sticks just so they look better.  If a person was smart they would put one puzzle on one side of the stick and then a different puzzle on the other side of the stick.  Therefore needing half the amount of sticks.  A not so smart person, such as myself, just uses a whole bunch of single sided sticks.


Your sticks will need to dry before you can play, but rubber cement doesn't take long to dry.


To play with the puzzles, just hand your child the finished group of sticks.  You can make it easy by separating each puzzle to do one at a time, or the whole pile so your kid has to pick the right pieces before assembling.


We really really like craft stick puzzles.  (Isn't that the cutest little monkey you have ever seen?  And I'm not talking about the cartoon one, although it's kind of cute too.)

March 12, 2012

free paperdolls printable

One time my mom drew some paper dolls that looked just like my sisters and me. And they were awesome. I'm not willing to draw custom paper dolls for everyone though. Because that is just crazy talk. But you can get these free paper dolls to print and play with and make fun memories with your kids.

click to download

Print these on cardstock and laminate them to last longer.  Or you can cut off all the tags and mount the pieces on magnetic strips to get the clothes to stay on easier.  The magnets also allow you to play with the dolls in fun places like the fridge.

I plan on posting more clothing to print with these every once in awhile.  But let me ask you a questions - do you want a boy version?  Do boys like to play with paper dolls?


divider gray zig zag 
REMINDER: Printables from Peonies and Poppyseeds are free for non-commercial, personal printed use only. Mass production and file sharing are not permitted. If your friends or family want to know where you got your printables, send them to our site. Thanks!

February 28, 2012

Fun Food Bingo Game Printable

We like playing bingo at our house.  Especially when we get to mark the squares with candy or cereal or something.  Because then, when you win, you get to eat the treat!

Here is a fun food bingo game printable for you and your kids to enjoy - it comes with 5 different player bingo cards and all the calling cards (so you can put them in a pile upside down and pick the next square to mark at random by drawing one card at a time).  Just click to download:

click to download


Never miss a freebie, subscribe to our RSS feed!
AND follow us on Twitter, become a Facebook Fan, or keep-up via Networked Blogs!

February 9, 2012

Quick and Easy: DIY Banner Tutorial

Banner’s are all the rage right now, and I don’t know about you, but the weather where I’m at has been a little too gloomy for my taste. So I decided to make a quick and easy, spring-ish, could also pass as Valentine’s-ish banner…. IT’S WHAT MAKES ME HAPPY, ALRIGHT?

To start, you need to gather your supplies. I went with a greenish/pink cottage type vibe, because a) I had it and b) I like it. And those are the two most important components to this sort of afternoon craft.

diy banner 1
Next, I cut the papers into 5x7 rectangles.

diy banner 2
And this is not related to the task, but the day was rather gloomy and dreary, and the lighting was oh so terrible. I tried to fix it, but no go. I’m just letting you know, so as to explain why the pictures are slightly different shades of colors.

NEXT STEP: Trimming the ends. I cut out a point, also known as a triangle.  Now some people would throw the triangle pieces away, but oh no, not I.  TRIANGLES FOREVER! 

diy banner 3
Now, you should have two stacks of papers. A cute banner shape stack, and a triangle shape stack.
CRITICAL STEP! Lay out the banner pieces in an order that is pleasing to thine eye. If you used all the same types of paper, awesome. If you mixed and matched from your scrap pile, awesome. Lay it out, move it around, play with the order until you like it.

Then, you mix and match the triangle pieces over the tops of those… like so:

diy banner 4
Now you’ll notice that I didn’t put the triangle pieces all the way to the top. For this banner, I chose to score, then fold, and staple the banner. If you want to put the pieces all the way at the top, you can. It’s you banner, so it’s your call.

But for the sake of argument, I’ll show you my score line. It’s a little less than a half an inch from the top, not that I measured. I eyeballed it.

diy banner 5
I also couldn’t find my scoring tool, so I used a flat head screwdriver instead. If it works, it works. You could also use the back of a butter knife, if you can’t find your screwdriver, not that I’ve ever had to do THAT before *cough*.

diy banner 6
ANYWAYS. After you have finished scoring all your banners, then you can start to assemble them to your liking. Glue down the triangles, add some embellishments… whatever you have, that you like.

diy banner 7
Once that’s all done, you’re ready to attach the banner flags. I had grosgrain ribbon on hand, so that is what I used. (Can you sense a theme here?)

diy banner 8
I just slipped the ribbon under the flag, and then folded the scored edge over. Then I stapled each end, and once more in the middle just for good measure.

diy banner 9
I spaced each flag about three fingers apart, and got my assembly line on.

When everything was attached, I used some extra ribbon to tie a knot between each flag for some pizazz. (Plus, I really like ribbon.)

diy banner 11
The nice thing about this banner is that it’s LIGHT, so I grabbed my scotch tape, and hung it on up.

Instant cheer on this cold, winter day.

diy banner 10

Total cost for this project: $0, but that’s only because I had everything on hand. And my four year old totally go in on the action and helped glue and assemble everything. Perfect way to brighten up any rainy day.

October 19, 2011

Get in the Spirit: Five Great Halloween Books for Kids

I am an avid reader, and I do everything I can to pass that love on down to my kids. Naturally, this means that I pick up books about all sorts of holidays and seasons, because what better way to get in the mood then by reading all about your favorite days? Here are some of our Halloween favorites:

humbug witch1. Humbug Witch by Lorna Balian – This is a big hit with the girls in my house. It’s a story about a witch who looks truly terrifying, but can’t quite seem to DO witchy sorts of things. Her cackle sounds more like a giggle, and her broom? Didn’t fly!

a halloween mask for monster

2. A Halloween Mask for Monster by Virginia Mueller – What can I say, Monster needs a Halloween costume, but his masks are too scary. He tried to be a girl, and a boy, and even a dog, but all of those masks were just too scary. What does Monster finally decide to go as? Himself!

go away big green monster

3. Go Away Big Green Monster by Ed Emberley – When my oldest went to kindergarten, this was the first book he checked out of the school library. Then he renewed it every time he had library for the next two years. It’s definitely a family favorite, and your kids will get a kick of telling the big green monster to go away!

where the wild things are

4. Where the Wild Things Are by Maurice Sendak – It’s not really a Halloween book, but it has wild things that roar their terrible roars and gnash their terrible teeth. Max sails across the sea and becomes King of the Wild Things, but is that really what he wants?

the little green witch

5. The Little Green Witch by Barbara Barbieri McGrath – A spooky take on the classic Little Red Hen. The Little Green Witch’s friends don’t help with any of the unhousework, and she has to hang the cobwebs and tend the pumpkins all by herself. When it’s time to eat the pumpkin pie, the little green witch has a surprise for her lazy friends.

* * * * * * * *

Get Peonies and Poppyseeds newest posts in email or in your blog reader.

Follow us on: Twitter, Become a Facebook Fan and keep-up via Networked Blogs!

October 6, 2011

spidery eyeball topiary tutorial

Halloween is my favorite holiday because you get to decorate with things like eyeballs and plastic spiders. 


What you'll need to make your own spidery eyeball topiary:


Not pictured: plastic eyeballs I got at the dollar store, double sided tape, scissors, a spoon, toothpicks and a thumbtack.  Also, I watched Netflix while I made this, but that's not really required.


First, decorate your pot (I used ribbon and double sided tape):


Your styrofoam cone should fit into the bottom of your pot once it's trimmed, and you can make the hole with your wooden dowel:


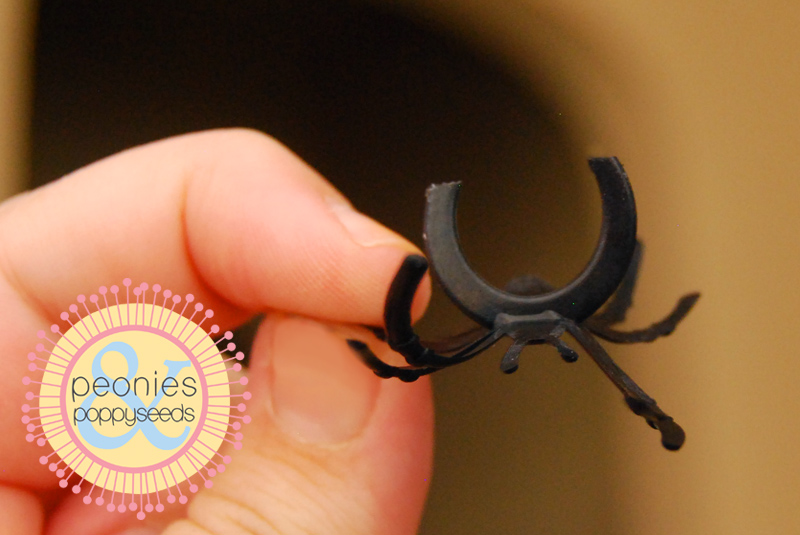
Cut the bottoms of the spider rings so they're all sharp and jabby:


Jab the spider rings into your styrofoam ball, but leave spots for the eyeballs, and dig a little pit with your spoon so the eyeballs will fit in the styrofoam a little deeper:


Make a hole in the eyeball with a thumbtack and then stick a toothpick in the hole so that it fits snugly:


Jab the eyeballs into the pits, and then put spiders around them so it looks like the spiders are crawling on the eyeballs (mwahahaha):


Stick the wooden dowel into the bottom of the styrofoam ball:


Put your heavier "stuff" on top of the styrofoam cone in the pot, I used rocks, you can use anything that will add some weight so your topiary won't fall over:


Put candy corn on top of your heavy stuff and tie a ribbon around the dowel:


Eyeballs are fun.  I mean, spiders are great too, as long as they're plastic and not real and creepy and in my house.  But I just really like eyeballs.


* * * * * * * *

Get Peonies and Poppyseeds newest posts in email or in your blog reader.

Follow us on: Twitter, Become a Facebook Fan and keep-up via Networked Blogs!

September 29, 2011

monster bookmark tutorial

Monsters are great year round, but with Halloween approaching it makes me like monsters EVEN MORE.  So here's a simple tutorial on how to make monster bookmarks with your kids (or if you want to do it by yourself, that's good too).

First, you need to cut a piece of thick paper so that it looks like this (the size is totally up to you, as long as it looks like this):


Then you need to fold it so that it makes a triangle.  The big flap folds like this:


The little flaps fold on top of that, and they overlap.

Then you'll want to glue the large flap to the inside and glue the smaller flaps to eachother, but -THIS IS IMPORTANT- don't glue your smaller flaps to your big flap because you want to keep it open inside the monster's "mouth" (otherwise it won't be able to "eat" your pages, it will just be a useless triangle).


Then trace your triangle onto the backside of a piece of scrapbook paper.  Twice.  And cut out those triangles.  Then glue a triangle to each side of your triangle.  This is your monster's "skin".


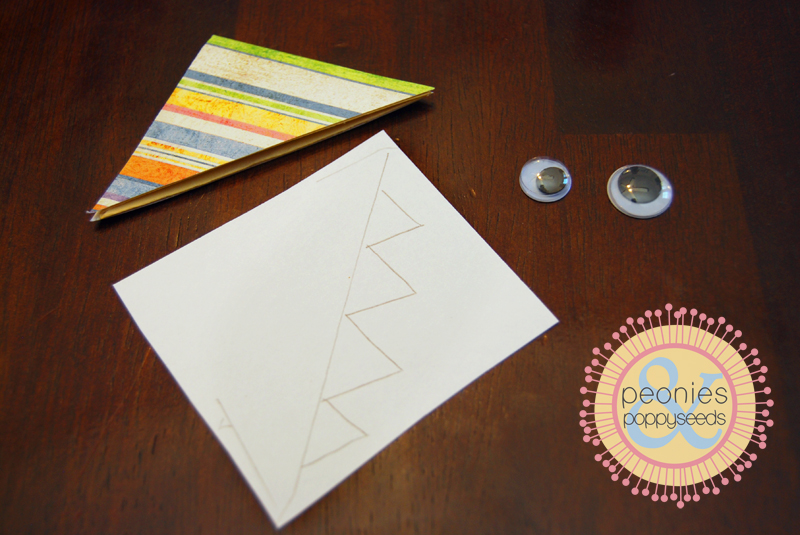
Then, on a white piece of thick paper, trace your triangle again, and then draw some teeth along the edge so that when they're done they'll be sticking out of your monster's mouth.


See?  See how I drew my monster teeth?  You'll want to cut that so it will fit inside your triangle, so cut a little bit inside the line you traced for your triangle.  And also, pick out your google eyes and glue those on too.


And, if your kids like to color on stuff as much as mine do, let them color their monsters with your good markers.


And that's pretty much it.  The great part is, your kids can make their monster bookmarks any way they want.  Also they can cut and glue their own pieces, so it's easier for you to make your monster bookmark awesome.


And everyone will be really happy to have a monster bookmark, I PROMISE.


And your 3 year old won't have to worry about losing her place when she's reading Jane Austen novels, because her monster bookmark will be eating her page and marking her spot.  (All you have to do is slide the monster over the page corner, which is why I told you not to glue all the flaps together.)


Monster bookmarks are awesome.


The End.


* * * * * * * *

Get Peonies and Poppyseeds newest posts in email or in your blog reader. 

Follow us on: Twitter, Become a Facebook Fan and keep-up via Networked Blogs!